Configuring and Setting Up Wholster
Now that you have installed Wholster, and your Products and Customers have auto-synced, there are a few required setup steps that must be completed before going live.
On the home admin page, you will see these Required Steps listed here:
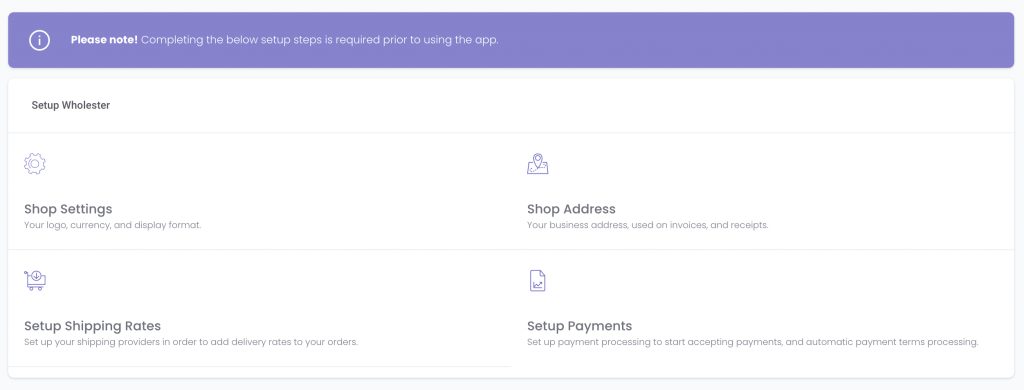
Let’s go through these setup steps one by one.
Shop Settings ⚙️
Click Shop Settings, and proceed with entering in the information for each field (some fields may already be pre-filled based on shop setting Wholster has pulled through): Company Logo, Email, Primary Locale, Money Format, and Currency.
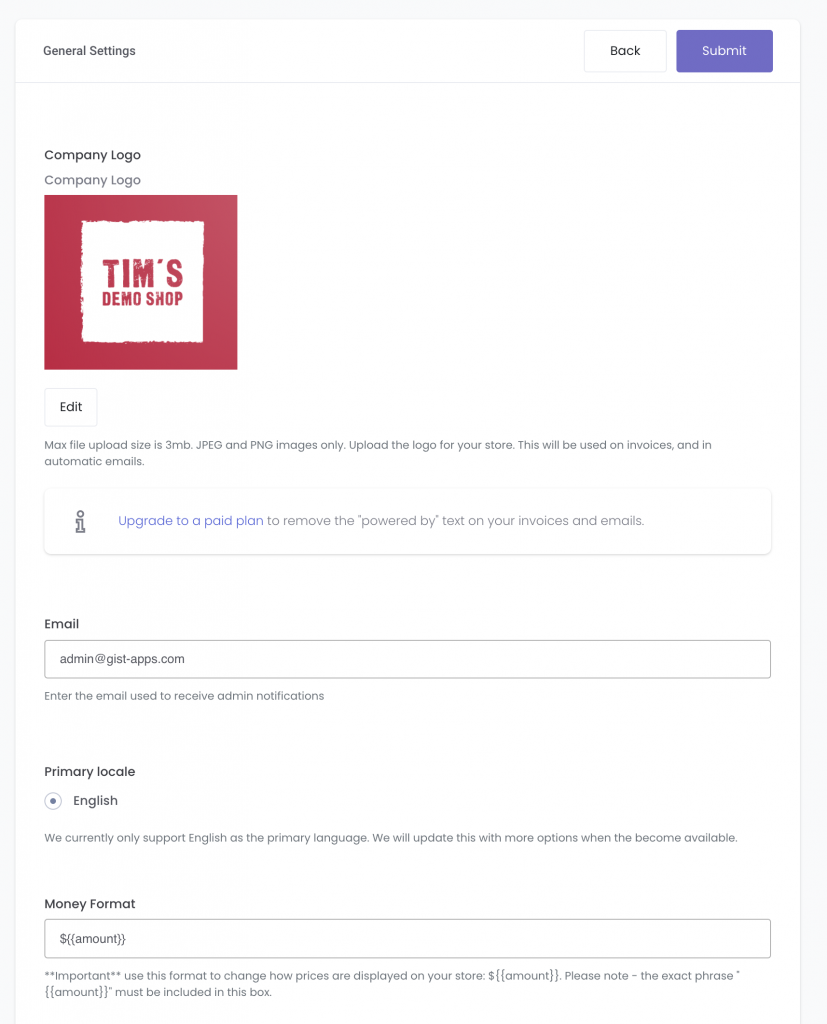
Once this is done, click ‘Submit’, and go back to your home dashboard.
(If you ever need to edit these Shop Settings in the future, go to Settings –> General from your Wholster dashboard.)
Shop Address 🌍
Click Shop Address, and proceed with entering in the information for each field. It is likely that all of these details have already been pulled through from Shopify. Therefore you should just need to press ‘Submit. Once this is complete, go back to your home dashboard.
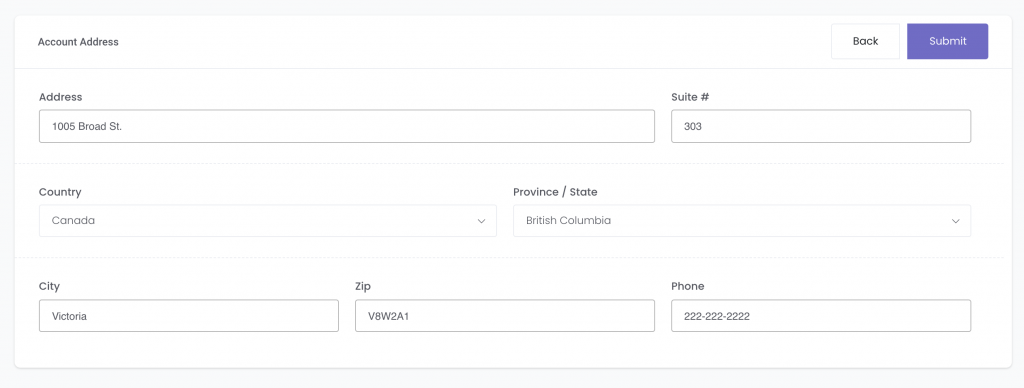
(If you ever need to edit your Shop Address in the future, go to Settings –> Address from your Wholster dashboard.)
Setup Shipping Rates 📦
Click Setup Shipping Rates, and proceed with choosing which carrier you would like to use, or whether you would like to setup Flat rates. Wholster currently integrates with four shipping services: UPS, Fedex, DHL, and Canada Post.
For each carrier, you will have the choice of pulling through public rates, and offering different delivery levels such as expedited or ground. You can also connect your own shipping account to pull through your custom rates.
Once this is done, click ‘Save’, and go back to your home dashboard.
Setup Payments 💳
Click Setup Payments, and select Start Setup under the Wholster Payments section

To begin with, confirm your basic store information, and review the Terms and Conditions. If all looks good, select Agree to Terms.
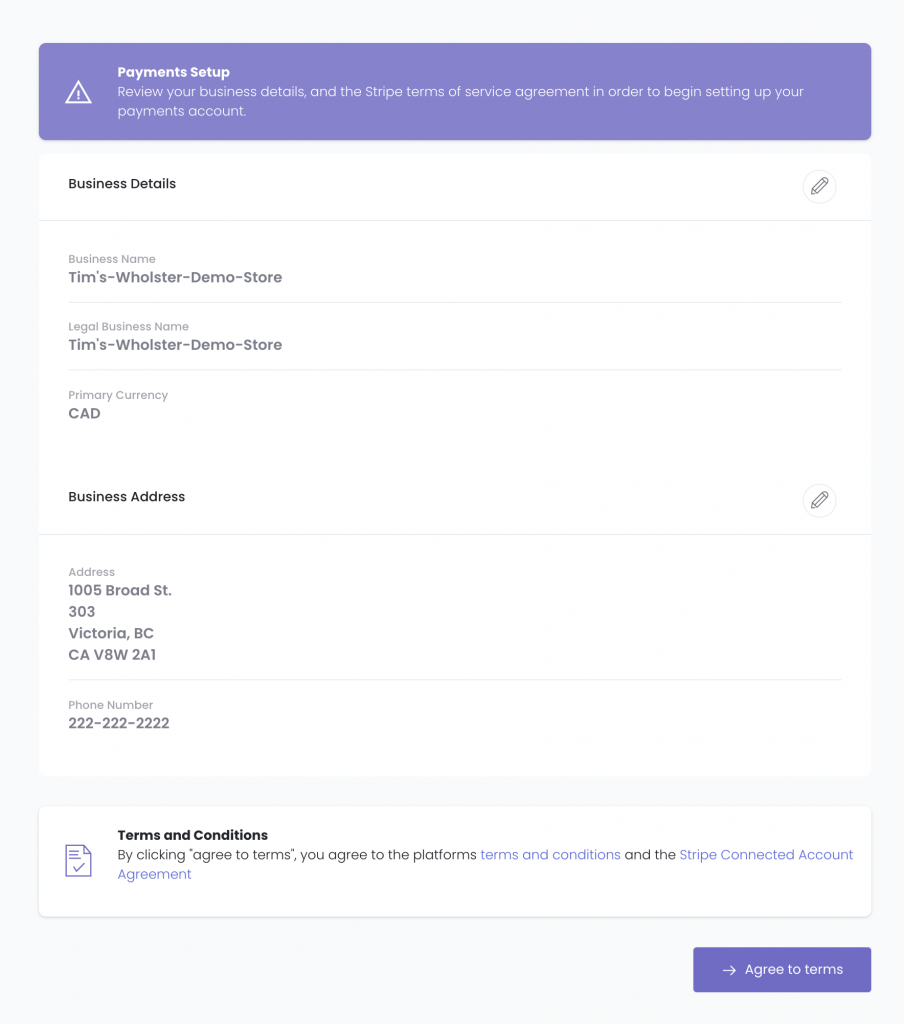
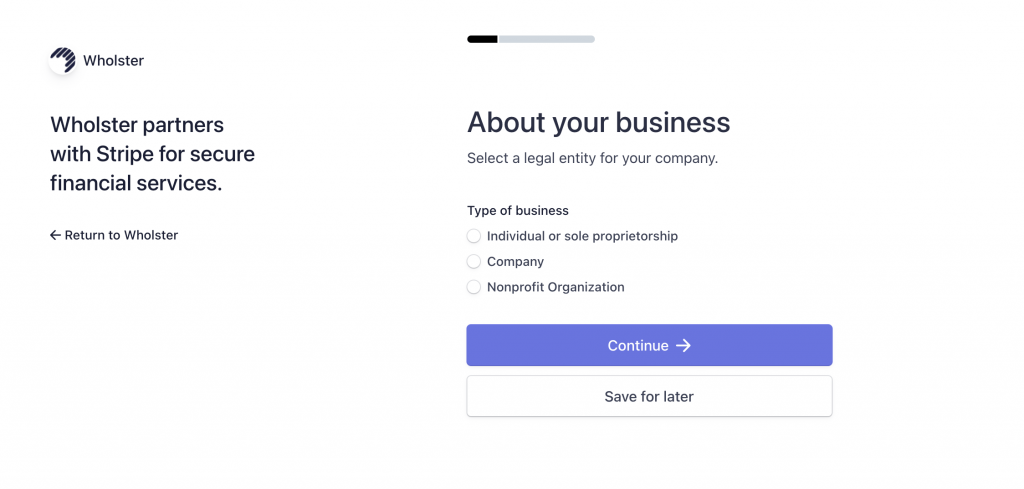
As Wholster uses Stripe to process credit card transactions (just like Shopify), getting your company setup through Stripe to accept payments is crucial to using the platform. (*Please note that all payouts will be automated, so you do not need to worry about dealing with another platform once your banking information is set up. Just as you do not interact with Stripe on your Shopify store.)
First, choose your type of business between Individual or Sole Proprietorship, Company, or Nonprofit Organization.
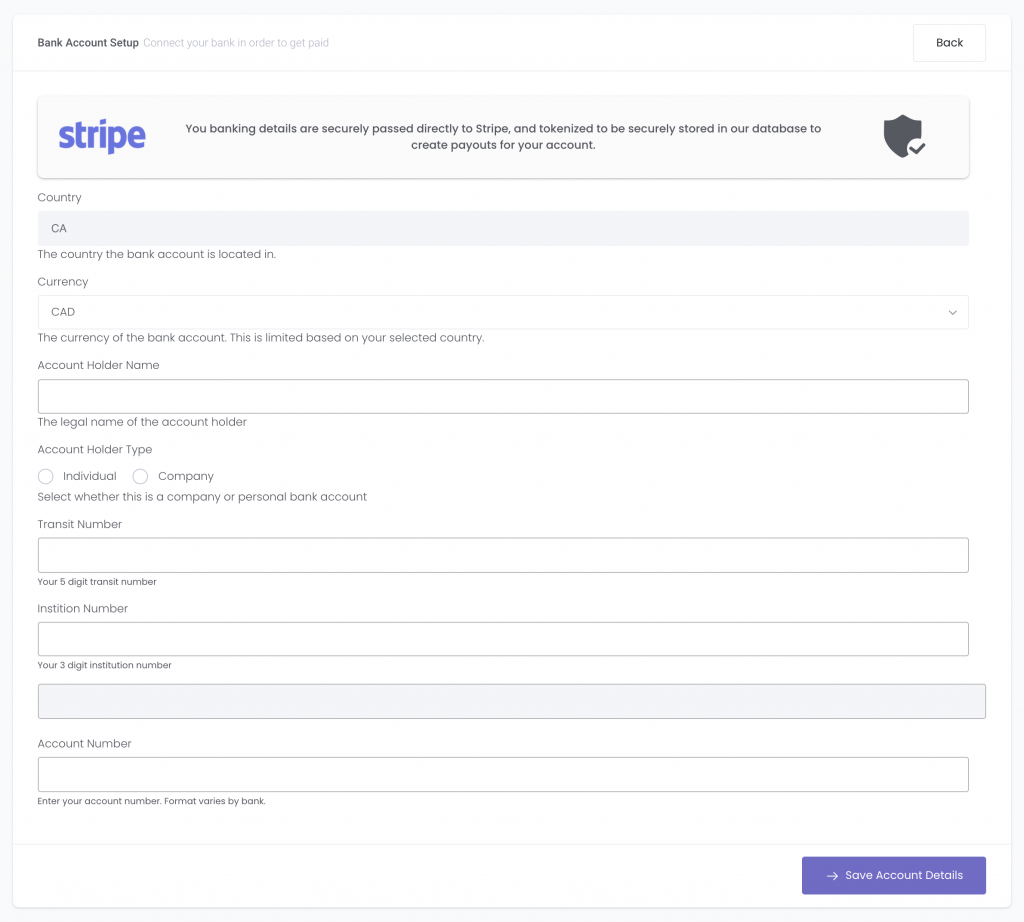
Depending on the legal structure of your company, complete the relevant fields to open your Stripe account. Once complete and verified by Stripe, you will be redirected to the Wholster Payments section once again. From here, getting your banking details entered will be crucial to receiving your Payouts. Click ‘Add Bank Details.’

Once you enter in your banking information, click ‘Save Account Details.’
You are now setup and ready to process orders on Wholster! 🚀