Creating Your Catalog Navigation
The first step in creating your catalog navigation, is to publish some of your Shopify collections to Wholster. If you have not created any collections in Shopify, you should start with reading the below article.
https://help.shopify.com/en/manual/products/collections
Once you have set up your collections, navigate to Wholster Admin -> Navigation -> Categories.
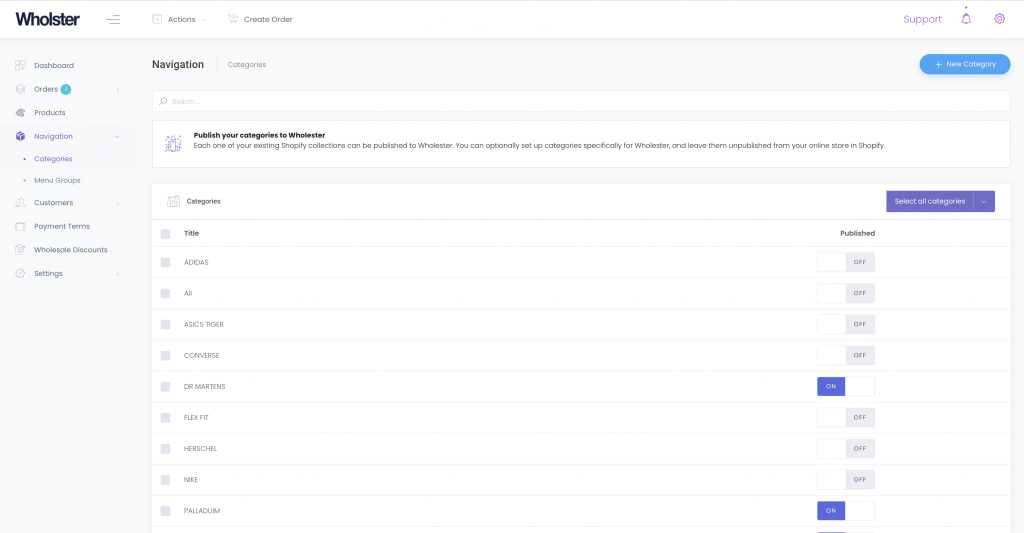
Once in the catalog view, select each of the collections you would like to publish to Wholster using the checkbox next to the collection name. Using the bulk actions tool in the top right corner of the categories list, select “publish”.
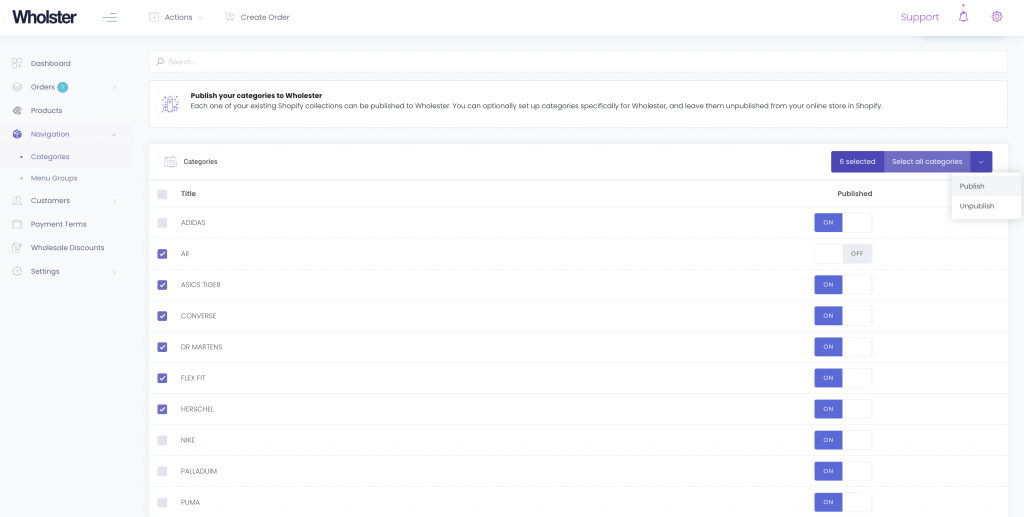
Your categories will then be published as a background task, so after a few seconds, refresh the page to see your published categories.
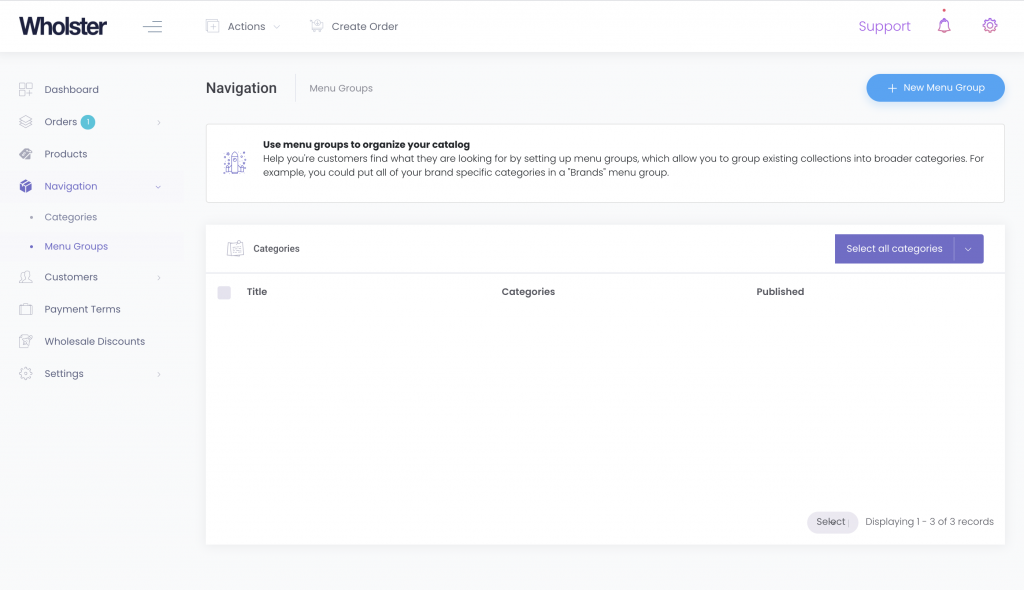
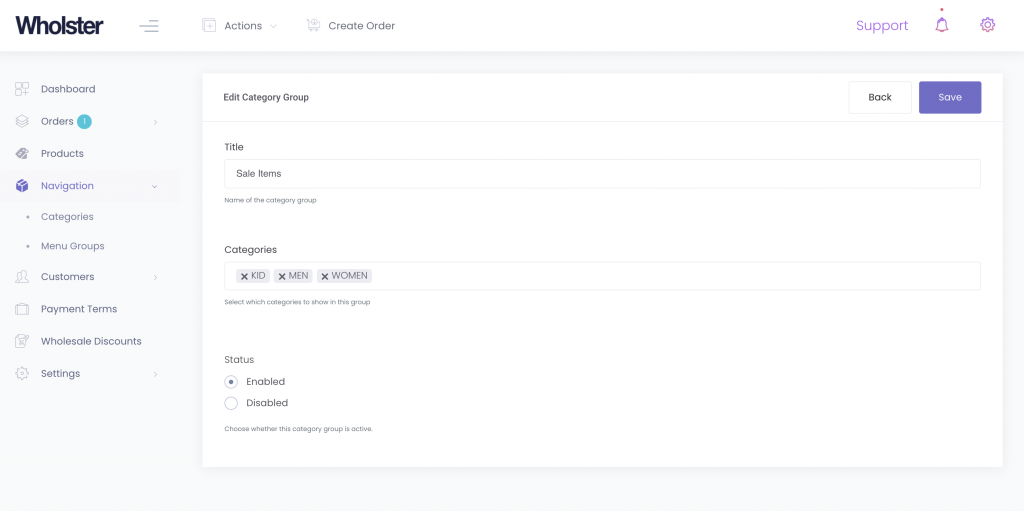
Now that your categories are published to Wholster, we can organize the navigation menu further by setting up “Menu Groups”. To do this, first navigate to Wholester Admin -> Navigation -> Menu Groups, then click the “New Menu Group” button in the top right corner of the page.
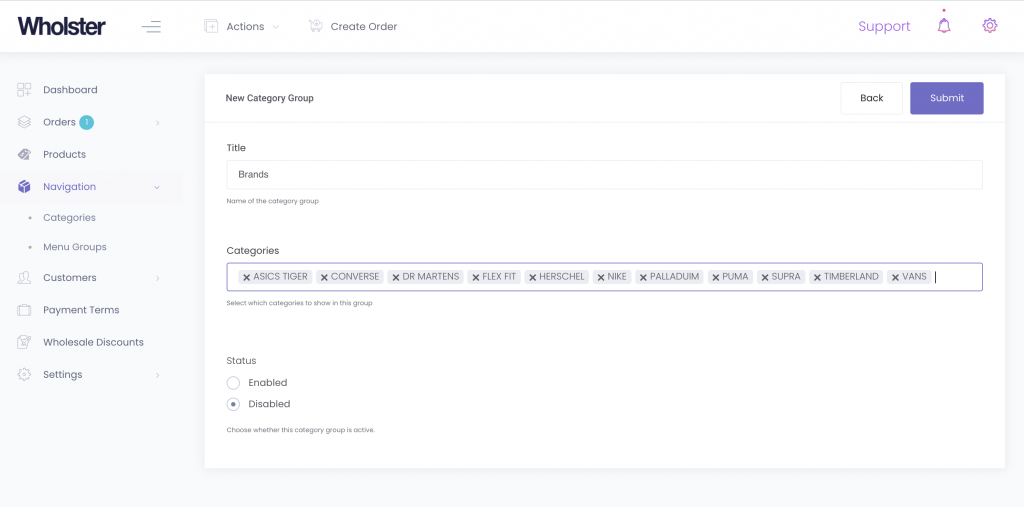
In the example below, we’re creating a “Brands” menu group, to make it easier to shop by brand on your catalog.
We’ll also set up a “Sale” menu group in this example.
Now that our menu groups are created, you can view your catalog to see the result by clicking the “Create Order” button in the top menu bar.
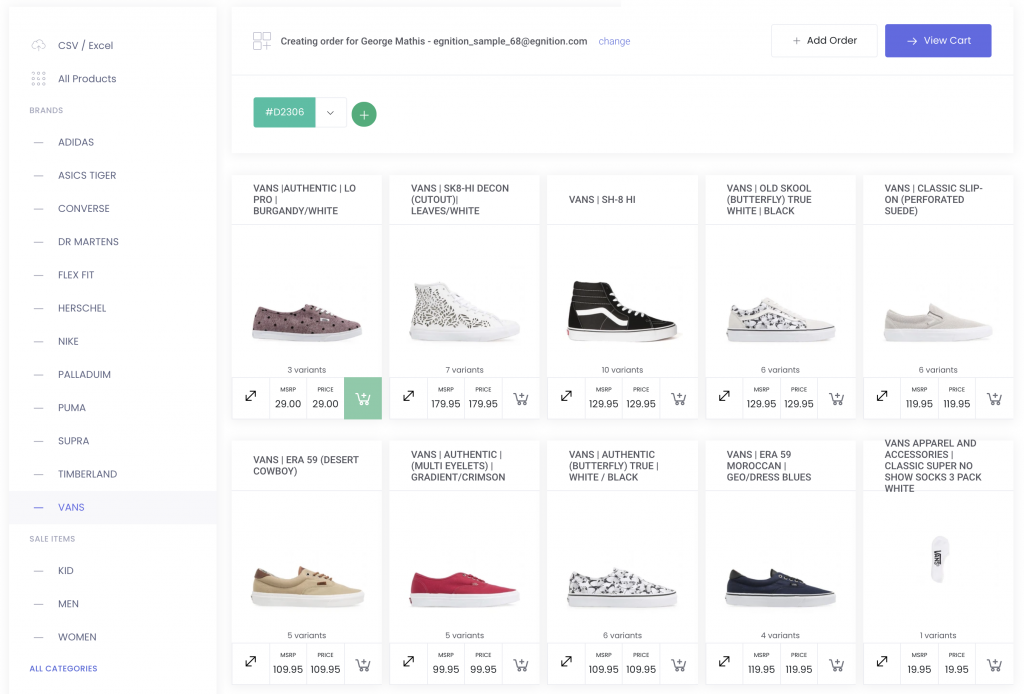
You can create as many menu groups as you like by repeating the above steps, in order to make your catalog easier to browse.